To create my masterpiece I used:
flat art canvas (bought in 3-packs at Michael's)
tracing paper
charcoal pencil
painters tape
template (I may be crafty, but artistic I am not)
glue gun
spray paint
The first thing to do was to transfer my design to the canvas. If you
have artistic handwriting, you could do this freehand, but my
handwriting is chicken scratch so I just found a font that I liked.
There may be an easier way to do the transfer but this is how I did it.
From here, you can see the problem. If I transfer the image like this it will be backwards. To solve this problem, I turned the tracing paper over and traced went over the lines from the back.
Remember, this is an outline, so your lines don't have to be perfect.
This is the reason that I used a charcoal pencil. When you apply a little pressure and rub over the words, the charcoal marks easily transfer to the canvas. I like to use a normal pencil for this step. It lets me know when I've covered the entire thing (wouldn't want to miss a letter!) and I find that the tip of a pencil exerts the perfect amount of pressure for transferring the image.
 |
| Isn't it pretty! |
 |
| This is my glue gun. Notice the lack of trigger. |
 |
| Here is my first attempt. I'm glad these canvases are relatively inexpensive!! |
 |
| Look what I found in the laundry room!!!! The same paint I used to repaint some things when I redecorated my room |
My finished product!!! It turned out better than I thought it would.
 |
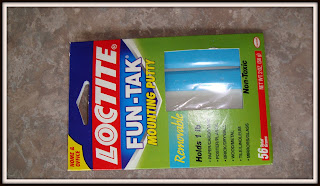
| Just a note...I love this stuff. You can hang anything with it and it doesn't leave a mark!!! |
 |
| A very bad picture of my very cool artwork hanging on my wall. |
Are you as fascinated by this concept as I am?? Oh the possibilities!!! :)


No comments:
Post a Comment